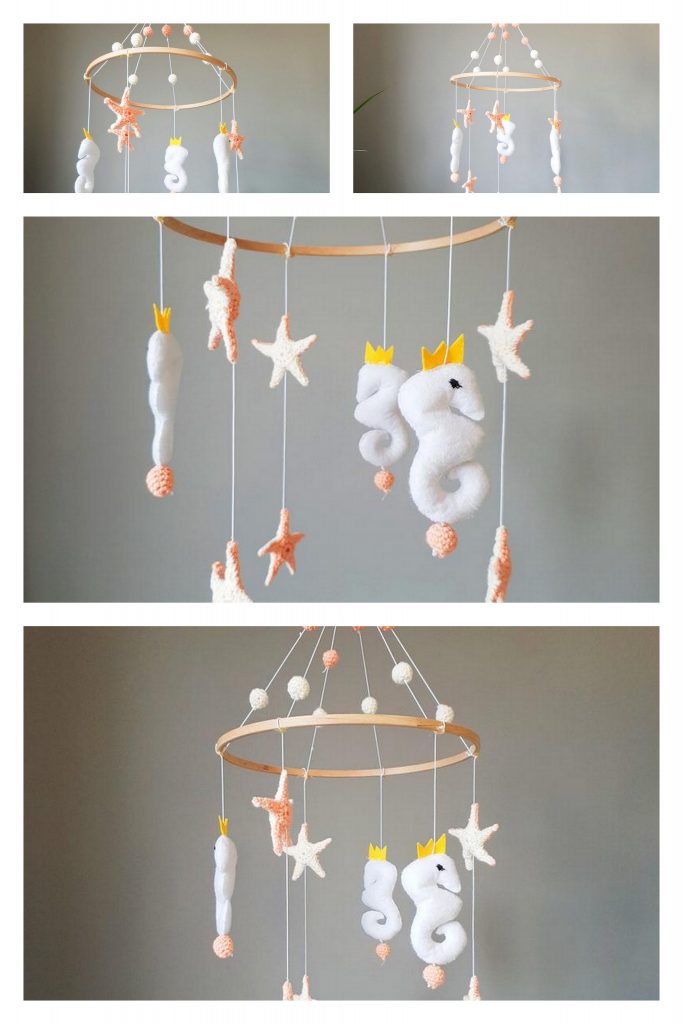
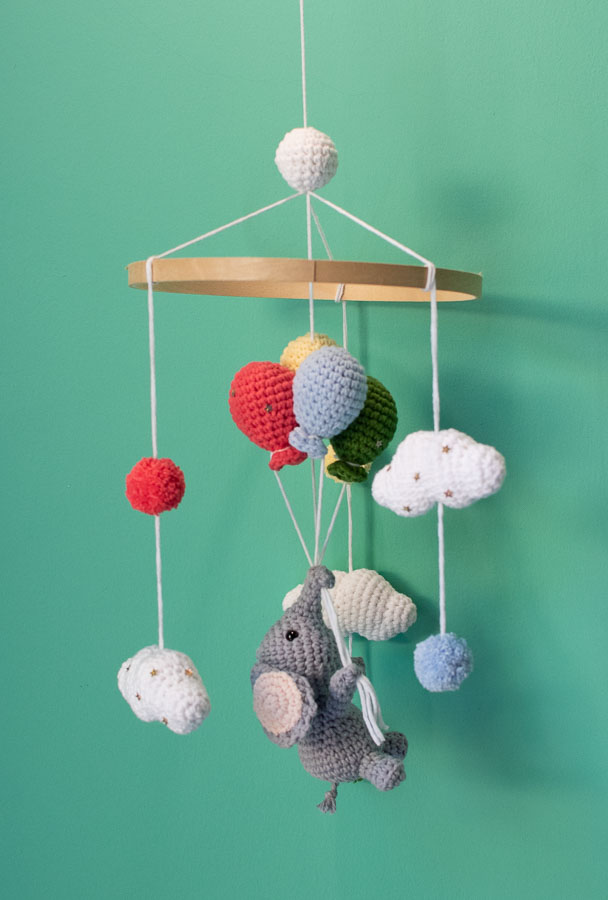
Amigurumi Elephant and Balloons Baby Mobile Free Pattern
Hello dear Amigurumi Followers
Today we share one free amigurumi crochet pattern again for you. As you know we share new amigurumi free patterns every day. The main crochets are amigurumi gazelles, amigurumi bears, amigurumi pola, amigurumi pandas, amigurumi penguins, amigurumi giraffes, amigurumi llama, amigurumi pigs, amigurumi bunny, amigurumi clowns, amigurumi lambs, amigurumi bees, amigurumi unicorns, amigurumi dolls, amigurumi foxes, amigurumi penguins, amigurumi dinosaurs, amigurumi elephants, amigurumi hippos, amigurumi monkeys, amigurumi cats, amigurumi dogs and more …
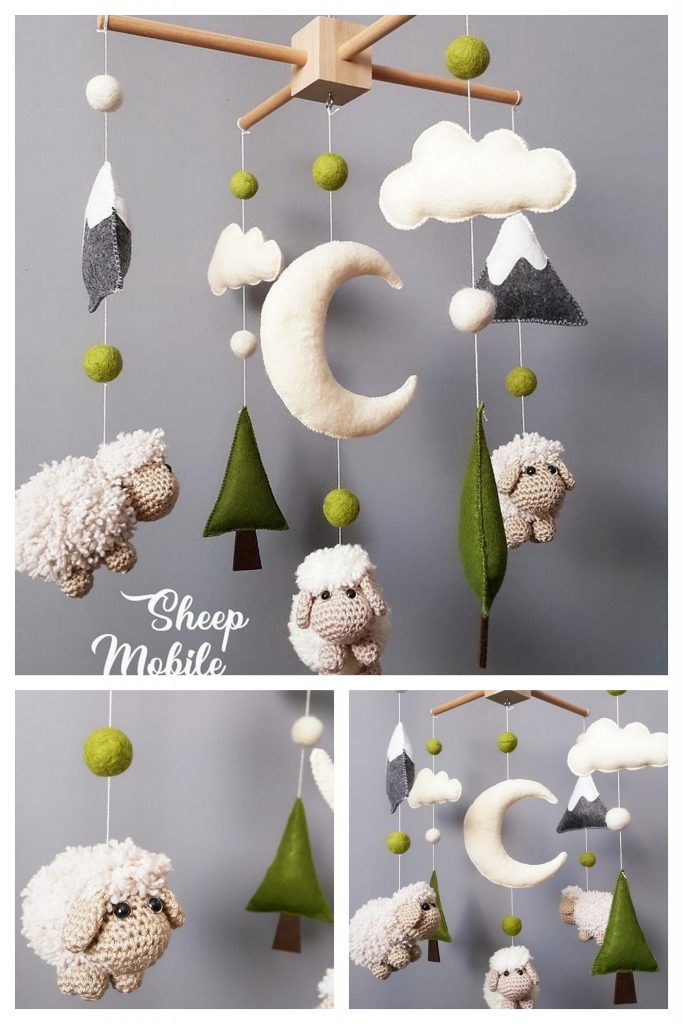
Todays daily new amigurumi free crochet pattern is Amigurumi Elephant and Balloons Baby Mobile.
I want to give you some informations about this pattern ;
MATERIAL
- 3.5mm / US E-4 crochet hook
- Yarn:#4 / aran / worsted yarn, 8ply, 80% cotton 20% Milk Fiber, in white, grey, light pink, light yellow, fushia, light blue, green (I use a local shop yarn, an equivalent would be Paintbox Cotton Aran but keep the 3.5mm hook to obtain tight stitches and avoid gaps where the fiberfill shows)
- Tapestry needle
- Fiberfill
- Stitch marker or a strand of thinner yarn
- A pair of 8mm safety eyes
- Ball point pins for assembly
- Sewing needle
- Yellow sewing thread (or any other color similar to your sequins color)
- Star shaped sequins with a hole to embroider
- 20 cm (8″) wooden/bamboo ring (it can be a bit smaller, and you can also use an embroidery hoop)
LEVEL
Adventurous beginners to intermediate
GAUGE AND SIZE
With the above material: 5-round circle = 5cm (2″).
With the material mentioned above and when gauge is achieved:
– The elephant is 11cm tall (4.3″)
– The cloud is 9cm long (3.5″) long;
– The balloon height is 6cm (2.3″)
– The ball diameter is 4cm (1.6″)
PATTERN NOTES AND SPECIAL TECHNIQUES
– The number before the abbreviation represents how many times to work one type of stitch into consecutive stitches from the previous round (unless stated otherwise). Ex: 3inc = work one increase into each of the next 3 stitches.
– This pattern is worked in continuous spiral rounds (i.e. without closing the rounds with a slip stitch) unless stated otherwise. It may help to mark the first stitch of each round with a stitch marker.
– For amigurumi in general, I always use an invisible decrease (unless stated otherwise) to minimize the gaps between these stitches so that the fiberfill doesn’t show too much. You can check this simple technique in a video tutorial here, but if it’s too much hassle and you prefer to start right away you can also work with normal decrease, no big deal!
– I use a great, easy, invisible colour change technique with no cut and sew, check the tutorial on my blog, or just use yours and replace the sl st and chain after the colour change by a normal single crochet.
– Magic ring
– Crocheting in the Back Loop Only (in BLO)
– Single crochet 3 stitches together (sc3tog)
STITCHES AND ABBREVIATIONS (US CROCHET TERMS
st: stitch/es
sc: single crochet
hdc: half double crochet
sl st: slip stitch
inc: single crochet increase (work 2 sc into the same st)
dec: single crochet decrease (single crochet two stitches together).
hdc inc: half double crochet increase (work two half double crochet in the same st)
Sc3tog: single crochet three stitches together
[number]: total number of stitches of the round
Rnd: round
(…) x 2: repeat whatever is in between the parenthesis the number of times indicated
in BLO: in the back loop only
in FLO: in the front loop only
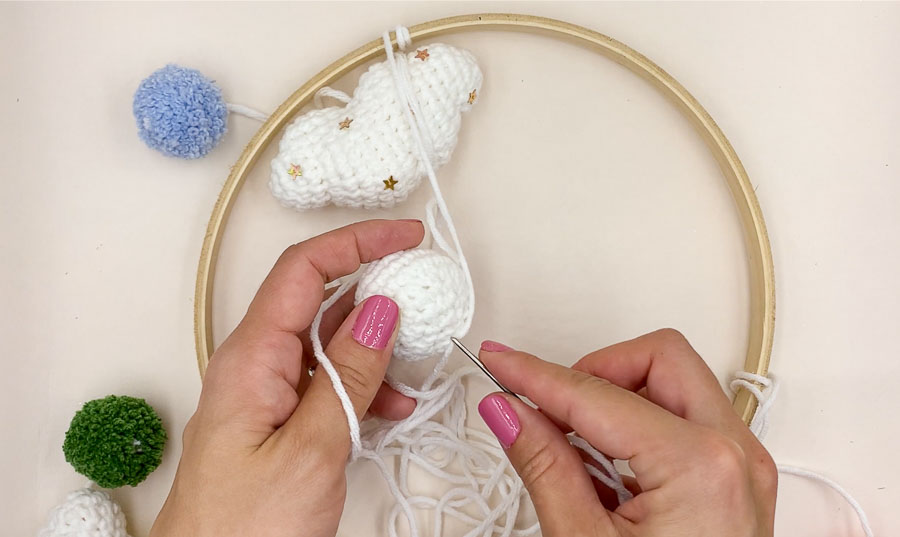
ORNAMENTS PATTERN
SMALL BALL PATTERN
With white yarn.
Rnd 1: work 5sc into a magic ring. [5]
Rnd 2: 5inc. [10]
Rnd 3: (sc, inc) x 5. [15]
Rnd 4: (3sc, inc, sc) x 3. [18]
Rnd 5: sc, inc, 4sc, inc, 5sc, inc, 5sc. [21]
Rnd 6: sc in each st around. [21]
Rnd 7: (5sc, dec) x 3. [18]
Rnd 8: 2sc, dec, 3sc, dec, 4sc, dec, 3sc. [15]
Rnd 9: (sc, dec) x 5. [10]
Rnd 10: 4dec, fasten off, finish stuffing and sew closed.

THE BALLOONS (make 4)
Rnd 1: work 6sc into a magic ring. [6]
Rnd 2: inc in each st around. [12]
Rnd 3: (sc, inc) x 6. [18]
Rnd 4: sc around. [18]
Rnd 5: (2sc, inc) x 6. [24]
Rnd 6 – 8: sc around. [24]
Rnd 9: (2sc, dec) x 6. [18]
Rnd 10: sc around. [18]
Rnd 11: (4sc, dec) x 3. [15]
Rnd 12: (3sc, dec) x 3. [12]
Stuff with fiberfill.
Rnd 13: 6dec. [6]
Finish stuffing.
Rnd 14: 6 hdc inc. [12]
Sl st, and fasten off. To close the small hole at the bottom of the balloon, so that no fiberfill can be pulled out (in case a young child would grab it), just use the yarn tail and insert the tapestry needle across the base of the hole a few times to sew it closed. Then hide the yarn tail inside.

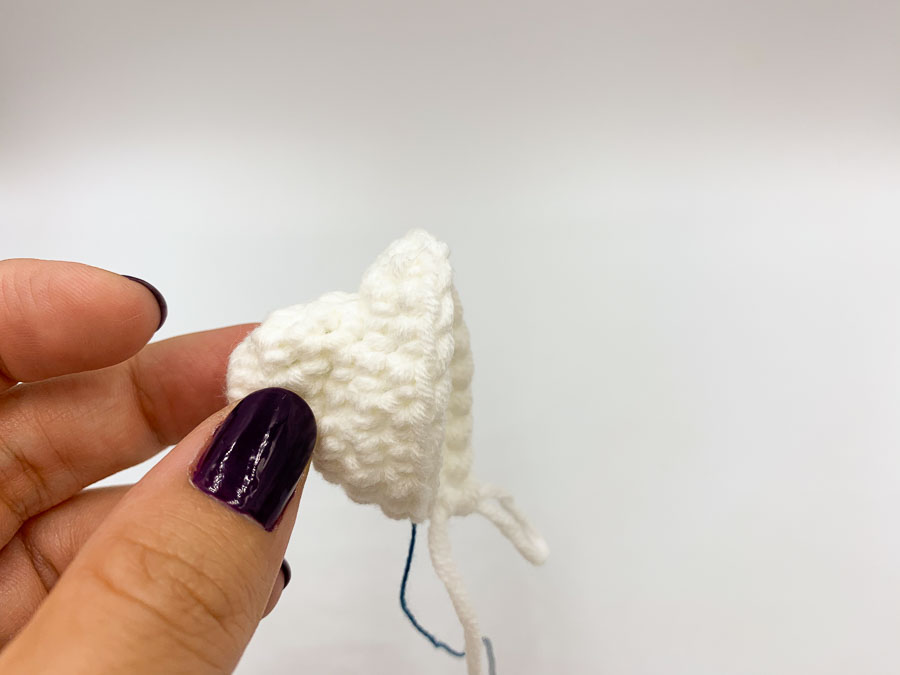
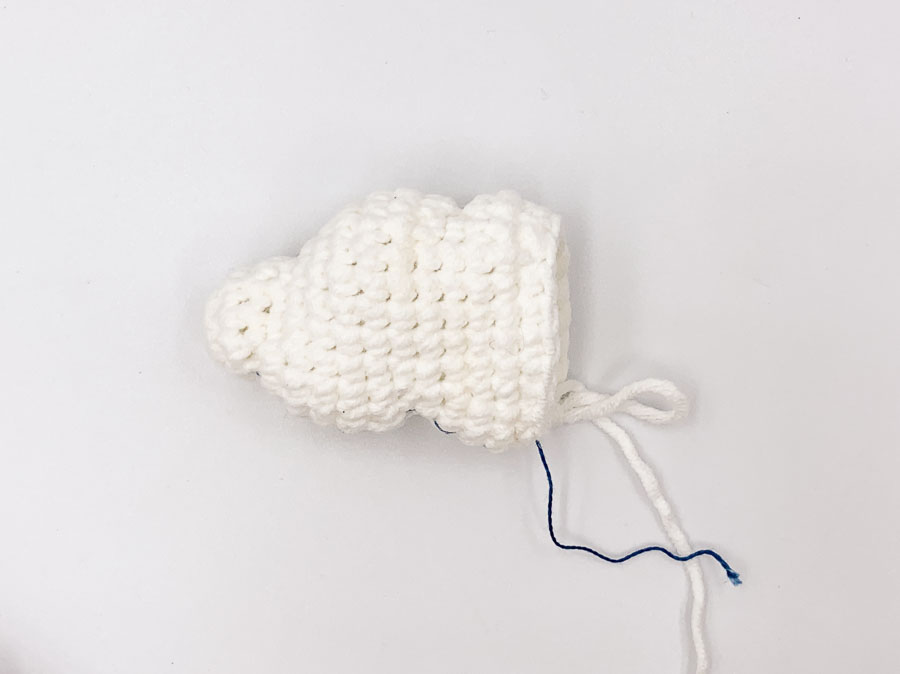
THE CLOUD (make 3);
Rnd 1: work 6sc into a magic ring. [6]
Rnd 2: 6inc. [12]
Rnd 3: 10sc, 2slst. [12]
Rnd 4: 2slst, 8sc, 2inc in FLO. [14]
Rnd 5: 2inc in FLO, 3sc, 4slst, 5sc. [16]
Rnd 6: 7sc, 4inc in FLO, 5sc. [20]
Rnd 7: 20sc. [20]
Rnd 8: 8sc, 4inc, 6sc, dec. [23]
Rnd 9: dec, 19sc, 2slst. [22]
Rnd 10: 2slst, 18sc, 2sc in FLO. [22]
Rnd 11: 2sc in FLO, 5sc, 4dec, 5sc, 2inc. [20]
Rnd 12: 2inc, 6sc, 4slst, 8sc. [22]
Rnd 13: 10sc, sc in FLO, 2inc in FLO, sc in FLO, 8sc. [24]
Rnd 14: 22sc, dec. [23]
Rnd 15: dec, 6sc, 4dec, 5sc, 2slst. [18]
Rnd 16: 2slst, 4sc, 3dec, 4sc, 2sc in FLO. [15]
Start stuffing.
Rnd 17: 2sc in FLO, 3sc, 5slst, 5sc. [15]
Rnd 18: 5sc, 2sc in FLO, inc in FLO, 2sc in FLO, 5sc. [16]
Rnd 19: (sc, dec) x 5, sc. [11]
Rnd 20: 5dec, sc. [6]
Finish stuffing, fasten off and sew closed. You can embroider with star sequins if you like it, or just leave it this way.

THE ELEPHANT PATTERN
THE HEAD
Rnd 1: Work 6sc into a magic ring. [6]
Rnd 2: inc in each. [12]
Rnd 3: (sc, inc) x 6. [18]
Rnd 4: (2sc, inc) x 6. [24]
Rnd 5: sc around. [24]
Rnd 6: (3sc, inc) x 6. [30]
Rnd 7 – 9: sc around. [30]
Rnd 10: (3sc, dc) x 6. [24]
Insert safety eyes between rounds 7 and 8 with 6 stitches between the two eyes.
Rnd 11: (2sc, dec) x 6. [18]
Start filling with fiberfill.
Rnd 12: (sc, dec) x 6. [12]
Fill a bit more.
Rnd 13: 6dc. [6]
Finish stuffing, fasten off and sew closed.

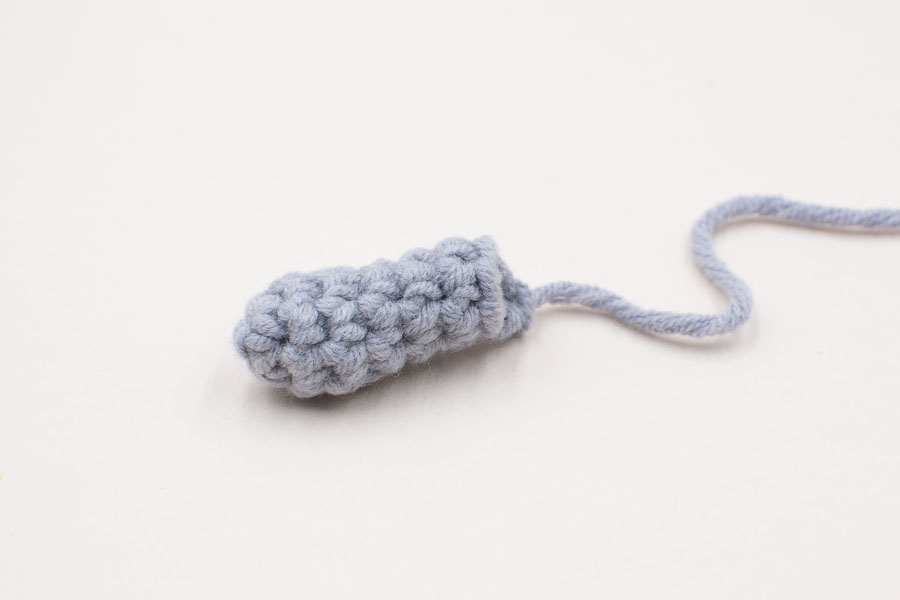
THE TRUNK
Rnd 1: work 5sc into a magic ring. [5]
Rnd 2 – 6: sc in each st around. [5]
After round 2, thread your tapestry needle with the yarn tail from the magic ring, and insert it in the central hole of your first round so that it exits on the other side of the trunk. You’ll use this yarn tail to secure the rolled tip of the trunk.
Rnd 7: inc, sc, inc, 2sc. [7]
Rnd 8: 2sc, inc, 2sc, inc, sc. [9]
Rnd 9: 3sc, inc, 3sc, inc, sc. [11]
Fasten off, fill with fiberfill.

THE BODY
Rnd 1: Work 6sc into a magic ring. [6]
Rnd 2: inc in each. [12]
Rnd 3: (sc, inc) x 6. [18]
Rnd 4: (2sc, inc) x 6. [24]
Rnd 5: (3sc, inc) x 6. [30]
Rnd 6 – 7: sc around. [30]
Rnd 8: (3sc, dec) x 6. [24]
Rnd 9: sc around. [24]
Rnd 10: (2sc, dec) x 6. [18]
Rnd 11 – 13: sc around. [18]
Start stuffing with fiberfill.
Rnd 14: (sc, dec) x 6. [12]
Fasten off, finish stuffing, and leave a long tail to sew to the head later on.

THE LEGS
Rnd 1: work 5sc into a magic ring. [5]
Rnd 2: inc in each st around. [10]
Rnd 3: in BLO, sc around. [10]
Rnd 4: (sc, dec) x 3, sc. [7]
Rnd 5 – 6: sc around. [7]
Fasten off leaving a long tail for sewing, and stuff with fiberfill, keep the base of the foot flat.

THE ARMS
Rnd 1: work 4sc into a magic ring. [4]
Rnd 2: inc in each st around. [8]
Rnd 3: sc around. [8]
Rnd 4: (2sc, dec) x 2. [6]
Rnd 5 – 7: sc around. [6]
Fasten off, leave a long tail for sewing, and don’t stuff the arms.
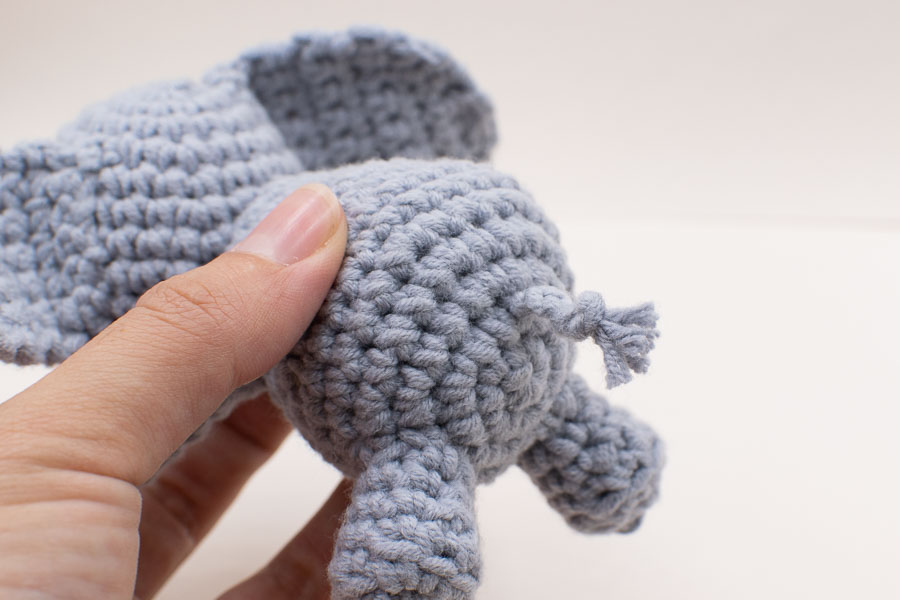
THE TAIL
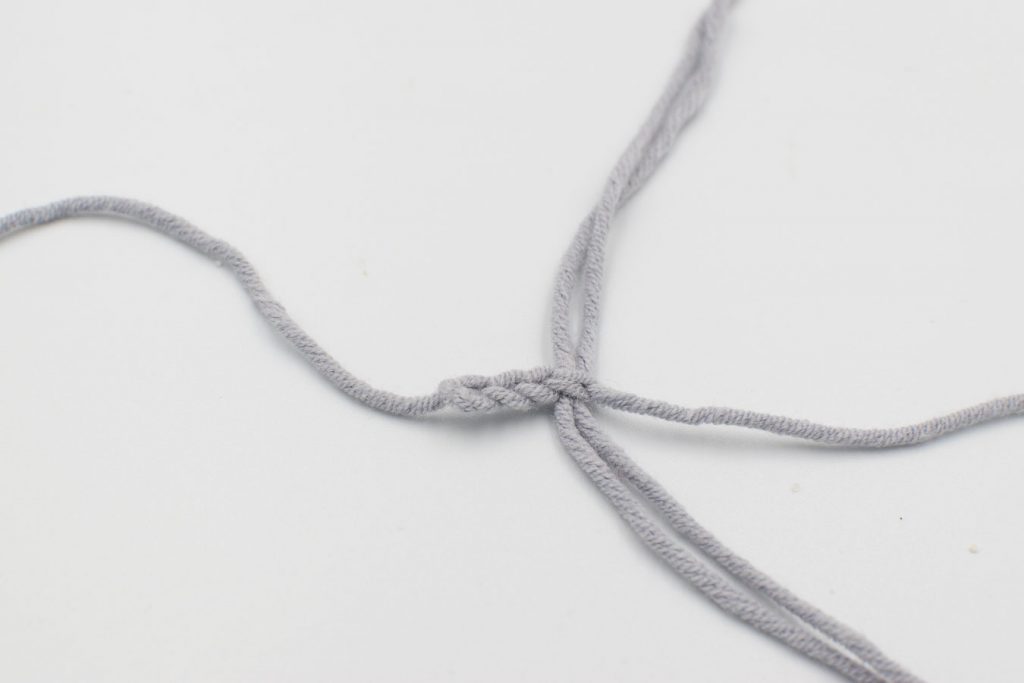
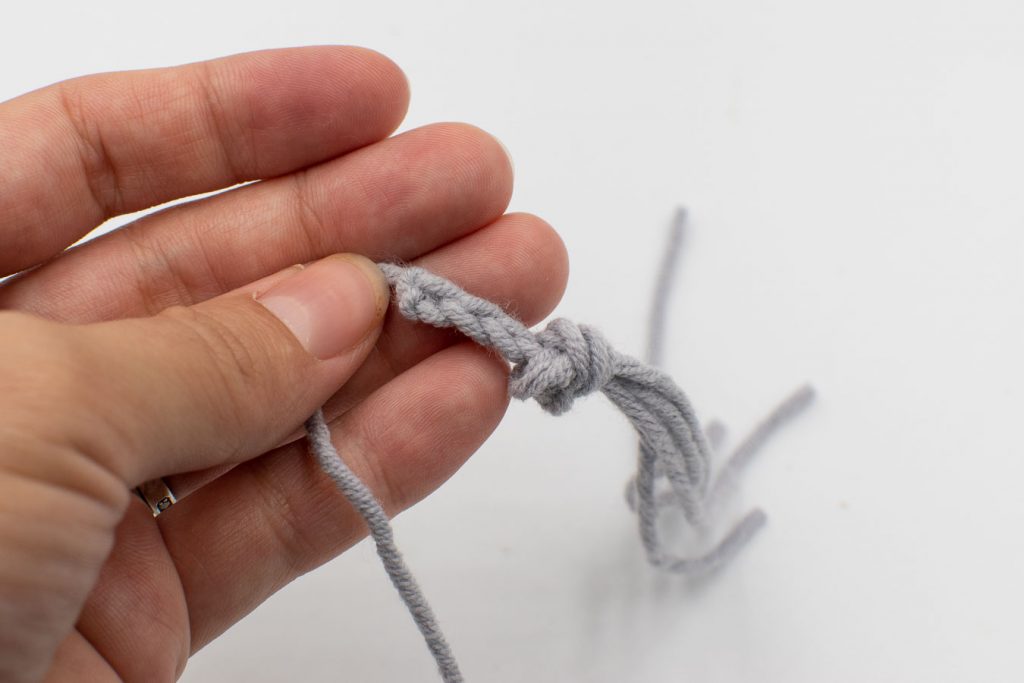
With grey yarn, make a slip knot, keeping a 15 cm (6″) tail before the knot (to attach the tail to the body later). Chain 4. Fasten off, leaving again about 15cm (6″).
Cut 2 pieces of grey yarn of 20 cm each (7.8″) and sew them through the last chain.
Then grab these tails on the same side and holding the tails together, make one big knot. Pull it super tight and cut the tails short.


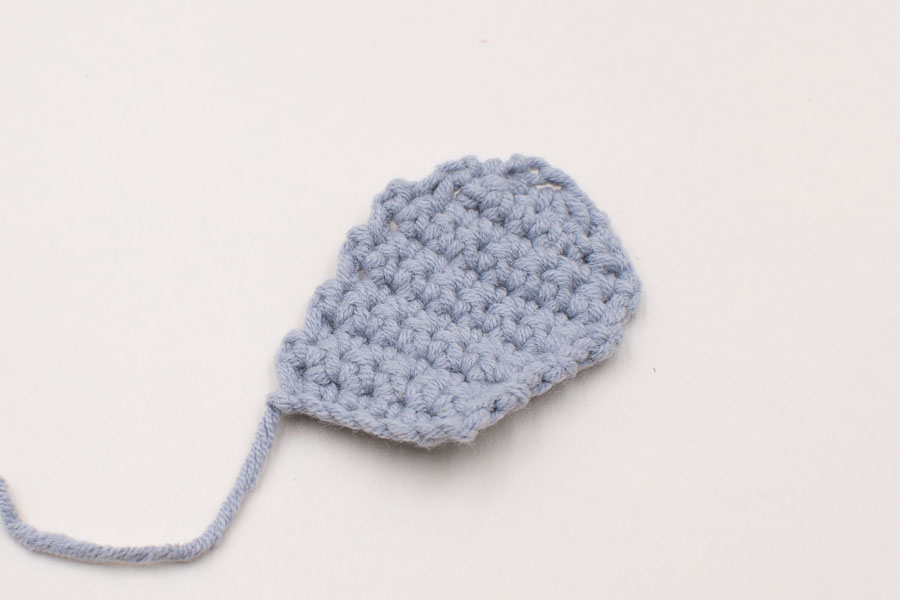
THE EARS (make 2)
The grey part of the ears is worked in rows. The turning chain doesn’t count as a stitch.
With light grey yarn.
Leave a long tail for sewing, make a slip knot, and chain 7.
Row 1: Starting in the second chain from the hook, sc in each st, chain 1, turn. [6]
Row 2 – 3: sc in each, chain 1, turn. [6]
Row 4: 5sc, inc, chain 1, turn. [7]
Row 5: sc in each, chain 1, turn. [7]
Row 6: 6sc, inc, chain 1, turn. [8]
Row 7 – 8: sc in each st, chain 1, turn. [8]
Row 9: 6sc, dec, chain 1, turn. [7]
Row 10: dec, 3sc, dec, chain 1, turn. [5]
Row 11: sc3tog, dec. [2]
Fasten off, secure the last stitch with a little knot and weave in yarn tail.
Make a second one.
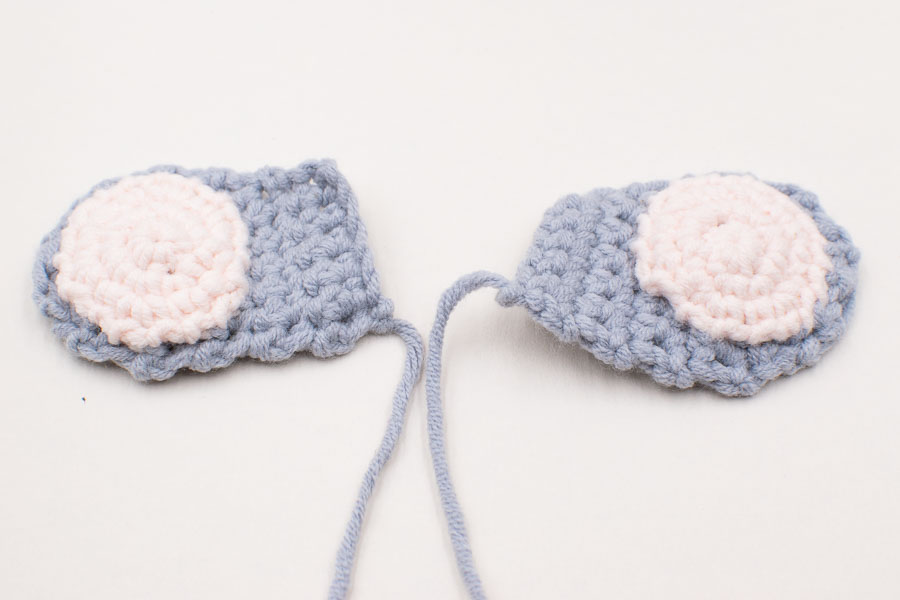
The inner ear (make 2)
With light pink yarn.
Rnd 1: work 6sc into a magic ring. [6]
Rnd 2: inc in each st around. [12]
Rnd 3: (sc, inc) x 6. [18]
Leave a long tail for sewing, fasten off and make an invisible finish. Make a second one.
Sew the inner ear on the flap part as on the picture below: the grey part will be sewn to the head using the starting yarn tail, and this yarn tail is the top of each ear. To make sure the sewing doesn’t show on the other side of the ear, don’t go through the rows with your tapestry needle, just grab some stitch posts at the surface. To flatten the pink part edges, insert your needle under both loops of the pink circle when sewing all around.
THE POM POM
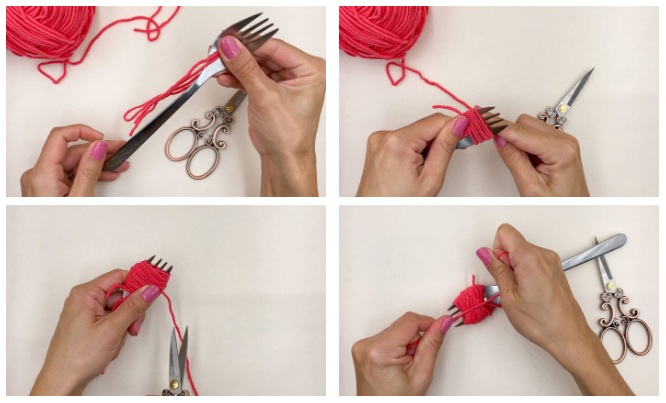
Pom pom are so cute they always make a cute addition to an amigurumi accessory. The problem is that you can’t always find the exact colour matching your ami when you buy finished pom pom. Plus you can’t control the level of fluffiness you want. If you want a super big pom pom for a crochet project like a beanie or scarf, then you’ll probably need more fancy tools like bigger size pom pom makers. But for an ami, you can just use a kitchen fork !
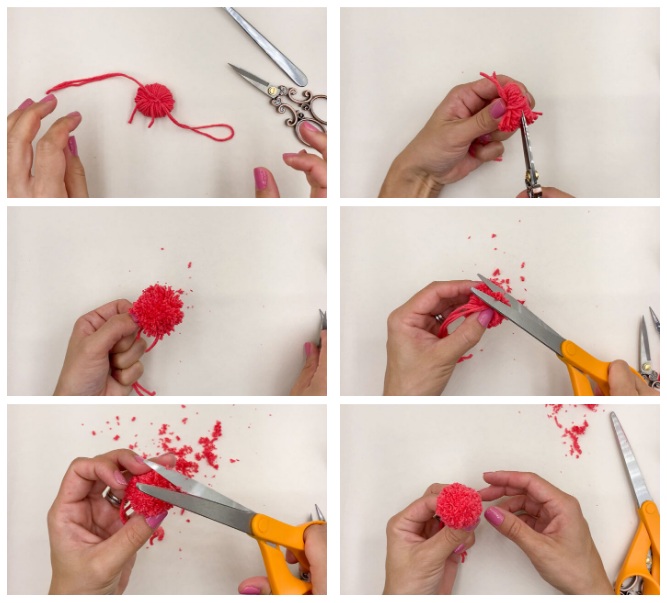
Insert a double piece of yarn in the middle of the fork. Then wrap the yarn around the fork, around 70 times (depends on the yarn you’re using and fluffiness you want to achieve). Cut the yarn end. Use the piece of yarn placed in the middle of your fork to make a very tight double knot around your wrap (a double strand of yarn is safer to pull tight without breaking the yarn). Pull it out of the fork delicately and tighten up the knot even more. Then with a very sharp pair of scissors, cut the loops (be careful not to cut the middle one with the knot). Then chop off your pom pom (do that above a waste bin or a surface you can clean easily, it gets a bit messy!) and trim until you reach a nice round and fluffy pom pom.
You can use the tails if you need to attach it safely on your project.
ASSEMBLY OF THE ELEPHANT
Before starting sewing, I strongly recommend to pin all pieces together to have a first view of the final result. It’s quite hard to estimate where one piece should go when the other ones are not yet assembled. It’s a bit messy because all the tails of the different parts will be hanging, but it might save you disappointment and frustration: once a piece is sewn, it’s difficult to unstitch if you find it too low or to high.
Be careful not to prick yourself with the pins as the elephant is quite small and the pins might be just under the surface. When you start sewing, you can remove the other pieces, and you’ll pin them back at the right place easily later, now that you’ve seen where everything should go.Sew the trunk to the head: the upper part of the trunk basis should be sewn between rounds 6 and 7 of the head (just one round above the eyes), as your elephant will be hanging from the trunk and looking up at the balloons.
1- Sew the head to the body using the body yarn tail. The head is leaning back.
2- Sew the legs to the body: the lower part of the leg basis should be sewn around round 4 of the body, the upper part between rounds 6 and 7, and the legs are pointing slightly towards the sides.
3- Sew the ears to the head: the yarn tail is the top part of the ears and should be sewn between rounds 3 and 4 of the top of the head. The two first rows of the ears will be sewn flat against the head, the rest of the ear will flip backwards (see pictures below).
4- Sew the arms to the body: the top of the arms should be sewn between rounds 13 and 14 of the body (so one round before the top of the body). There are 4 stitches between the two arms.
5- Sew the tail between rounds 2 and 3 of the body.


ASSEMBLY OF THE MOBILE
You can use the same white yarn, or a thinner one to make it even more airy.
1 ) Assemble the clouds and pom pom. Use a long piece of white yarn. If you want to place a pom pom below a cloud, insert your tapestry needle through the center of the pom pom (make sure it goes exactly through the central knot of the pompom) and secure the yarn tail using the pom pom strands of yarn (make a double knot, tighten it up to make it disappear inside the pom pom, and cut the yarn ends). Then grab a stitch at the bottom of your cloud and make a knot to secure its position on the yarn, and exit a the top of the cloud. If you want to place a pom pom above a cloud, just go through the center of the pompom, and make the pom pom slide at the right height.
2 ) Place the clouds and pompom on the wooden ring. Adjust the height of your elements, and wrap the piece of yarn twice around the ring. Then using your tapestry needle, go through the bottom of the white ball and exit on the side of the ball. Don’t make a knot yet to be able to adjust the height of your ornaments. Try to divide your wooden ring by three to distribute the ornaments evenly around the ring (approximately, you’ll adjust the balance later on). Pull on the yarn tails to place your ball at the center of the ring. You can slightly pull the ball up afterwards.

Check a first time the balance of your mobile: hold all the yarn tails up, and make the elements slide on the wooden ring until it’s balanced.
PS: if you really struggle to balance your mobile, it means one side is too heavy. What you can do is to add a fourth strand with more elements on the opposite side. Four hanging ornaments will be easier to balance than 3.
3 ) Pin your balloons together, and sew them together.

4 ) Take four pieces of white yarn, tie a knot at the base of each balloon, thread them all through your tapestry needle, and go through the rolled trunk of the elephant. Pull the strands of yarn gently, adjust the height of the balloons, and then go through a stitch of the right arm of the elephant.
5 ) Attach a new piece of white yarn to the balloons (make a knot at the bottom of a balloon, make the yarn end disappear inside the balloon) and exit through the top, approximately at the center of all balloons).6) Insert the yarn inside the ball from the bottom, exit towards the top of the ball (somewhere between rounds 1 and 2, not at the center). Adjust the height of your balloons and elephant, make a knot and hide the yarn tail inside.

CONGRATULATIONS!!! Your mobile is ready to decorate the room of a very lucky baby
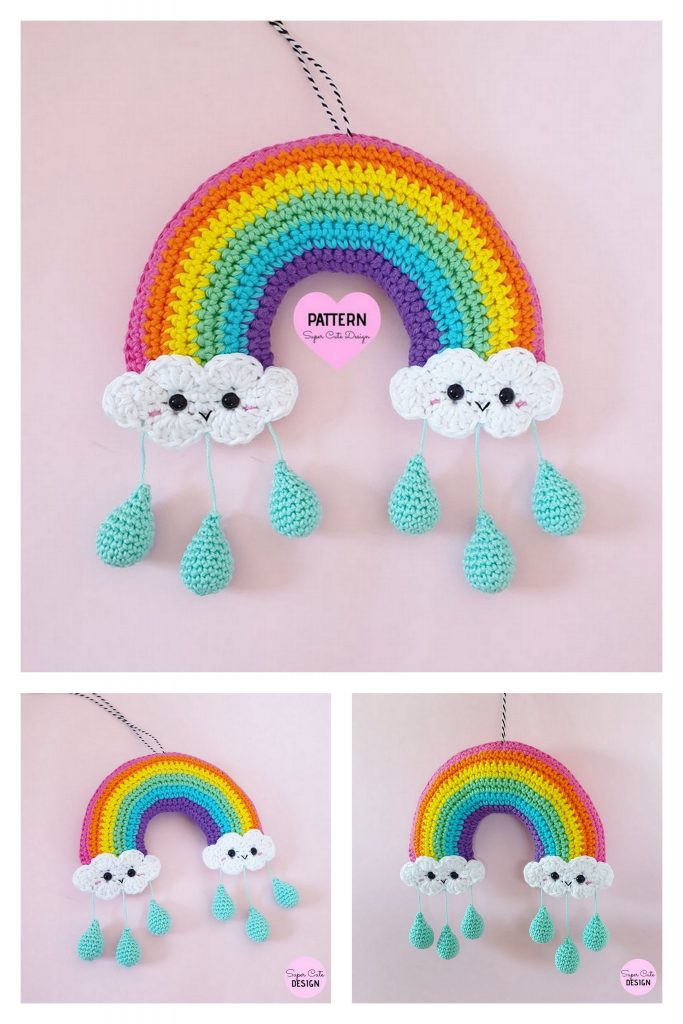
More Amigurumi Baby Mobile Ideas: