Amigurumi Cute Bunnies Free Pattern
Hello dear Amigurumi Followers
Today we share one free amigurumi crochet pattern again for you. As you know we share new amigurumi free patterns every day. The main crochets are amigurumi gazelles, amigurumi bears, amigurumi pola, amigurumi pandas, amigurumi penguins, amigurumi giraffes, amigurumi llama, amigurumi pigs, amigurumi bunny, amigurumi clowns, amigurumi lambs, amigurumi bees, amigurumi unicorns, amigurumi dolls, amigurumi foxes, amigurumi penguins, amigurumi dinosaurs, amigurumi elephants, amigurumi hippos, amigurumi monkeys, amigurumi cats, amigurumi dogs and more …
Todays daily new amigurumi free crochet pattern is Amigurumi Cute Bunnies.
I want to give you some informations about this pattern ;

Materials
List of all the materials you will need for this project:
• yarn ( I use 55% cotton yarn which measures 174 yards (159 meters) for 50 g, weight Sport /
5 ply (12 wpi), Gauge 24 to 30 st is 4 inches (10 cm)
You can use any color you like to make your bunny, but I do recommend light colors – I used
white and latte.
• 3 mm (D) hook
• cotton wool or other stuffing
• safety eyes ( 12 mm would be perfect)
• needle, thread, scissors, etc.
Abbreviations
sc – Single crochet
ch – Chain
ss – Slip stitch
hdc – Half double crochet
dc – Double crochet
tr – Treble
dtr – Double treble
BLO – Back loops only in this row.
Inc – Increase
Dec – Decrease
DecDC – Decrease double crochet
IncDC – Make 2 double crochet in 1 (Increase DC)
MR – Magic ring
FO – Fasten off
…X3 – Instructions between stars make 3 times
R1 – Row 1
(12) 12 is number of stitches after making this row
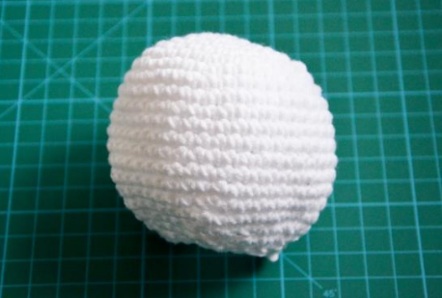
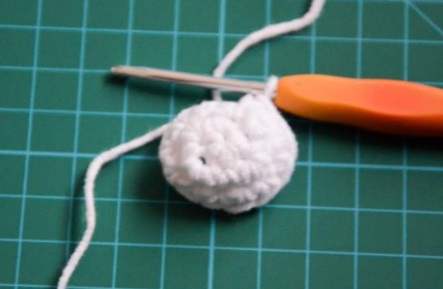
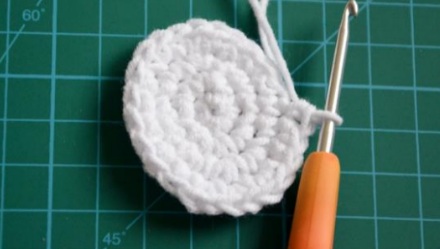
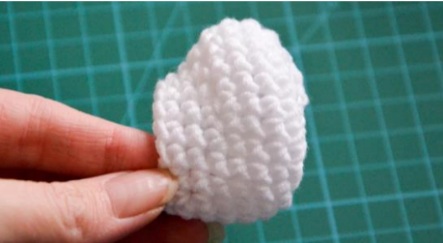
Head (Make 1)
white yarn
R1: 6 sc in MR (6)
R2: inc around (12)
R3: * sc, inc * X6 (18)
R4: * sc 2, inc * X6 (24)
R5: * sc 3, inc * X6 (30)
R6: * sc 2, inc * X10 (40)
R7: sc around (40)
R8: * sc 7, inc * X5 (45)
R9 – R15: sc around (45)
R16: * sc 7, dec * X5 (40)
R17: sc around (40)
R18: * sc 2, dec * X10 (30)
R19: * sc 3, dec * X6 (24)
R20: * sc 2, dec * X6 (18) FO


Ear (Make 2)
white yarn
R1: sc 6 in MR (6)
R2: * 3scin1, inc, sc * X2 (12)
(continued on next page)
R3: sc around (12)
R4: sc, inc 3, sc 3, inc 3, sc 2 (18)
R5 – R13: sc around (18)
R14: sc 3, dec, sc 7, dec, sc 4 (16)
R15: sc around (16) FO

Body (Make 1)
white yarn
R1: 6 sc in MR (6)
R2: inc around (12)
R3: * sc, inc * X6 (18)
R4: * sc 2, inc * X6 (24)
R5: * sc 3, inc * X6 (30)
R6: * sc 2, inc * X10 (40)
R7: * sc 7, inc * X5 (45)
R8 – R10: sc around (45)
R11: * sc 7, dec * X5 (40)
R12: * sc 6, dec * X5 (35)
R13: * sc 5, dec * X5 (30)
R14: * sc 4, dec * X5 (25)
R15: * sc 3, dec * X5 (20)
R16: sc around (20)
R17: sc 19, ss (20) FO

Leg (Make 2)
white yarn
R1: 6 sc in MR (6)
R2: * 3scin1, inc, sc * X2 (12)
R3: sc, inc 3, sc 3, inc 3, sc 2 (18)
R4: sc 3, inc 3, sc 6, inc 3, sc 3 (24)
R5 – R7: sc around (24)
R8: dec 6, sc 12 (18)
R9: sc around (18)
R10: sc around (18) FO

Tail (Make 1)
white yarn
R1: 6 sc in MR (6)
R2: inc around (12)
R3: * sc, inc * X6 (18)
R4 – R5: sc around (18)
R6: *sc 3, dec, sc 2, dec * X2 (14) FO

Hand (Make 2)
white yarn
R1: 6 sc in MR (6)
R2: * 3scin1, inc, sc * X2 (12)
R3 – R4: sc around (12)
R5: sc 2, dec, sc 4, dec, sc 2 (10)
R6 – R7: sc around (10)
R8: dec, sc 3, dec, sc 3 (8)
R9 – R12: sc around (8)
R13: sc around (8) FO


Okay, we have all the parts we need now.
Let’s sew them together.

Let’s start by stuffing.
Stuff firmly head, body and legs.
Stuff ears lightly.
The only parts we are not stuffing are hands.

Place the safety eyes – I recommend to place them under the half of the head (near R13) but you place
them wherever you feel like it should be.

Secure the eyes from the inside.

Place and sew the ears on top of the head.
(see the photo for reference)

Sew the first leg to the body – the part where you decreased 6 times in a row should be on top (see the photo for reference)

Place and sew the second leg same way as you did before.

Sew the tail on the back of the body.

Place and sew the hand on the side of the body, the open part of the hand is facing up. You can choose to
sew it only in the upper part or all along.

Place and sew the second hand.

Okay we have the head and body ready….

… all that is left is to sew them together very firmly.

Congratulations! Bunny is ready – now take other yarn color, go back to page 5 and make another one! :)..
and another one… and…
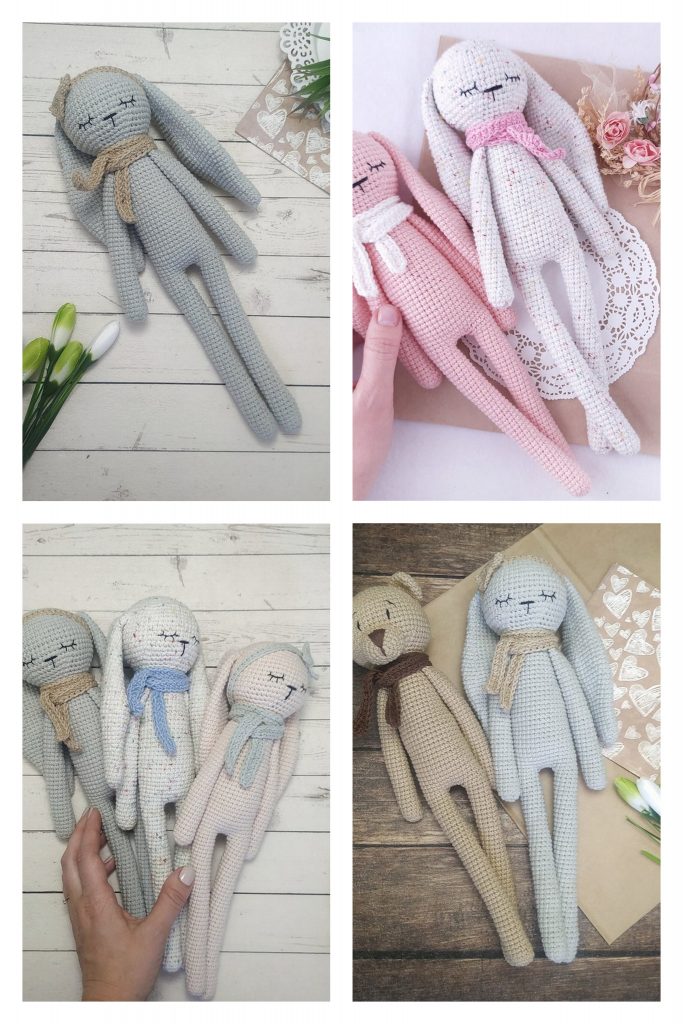
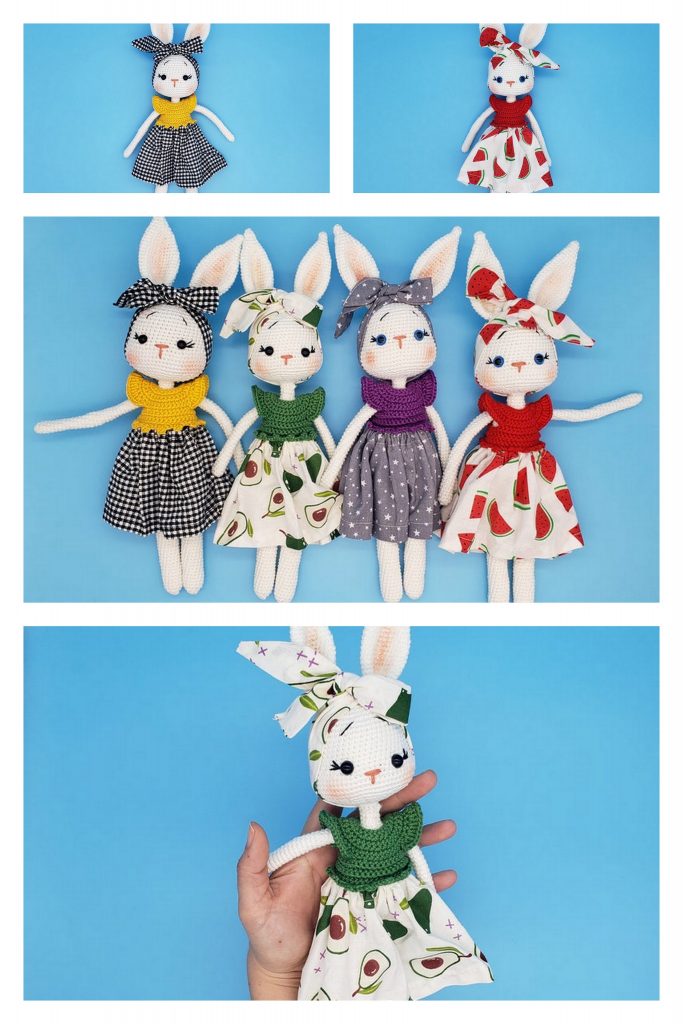
More Amigurumi Bunny Ideas: