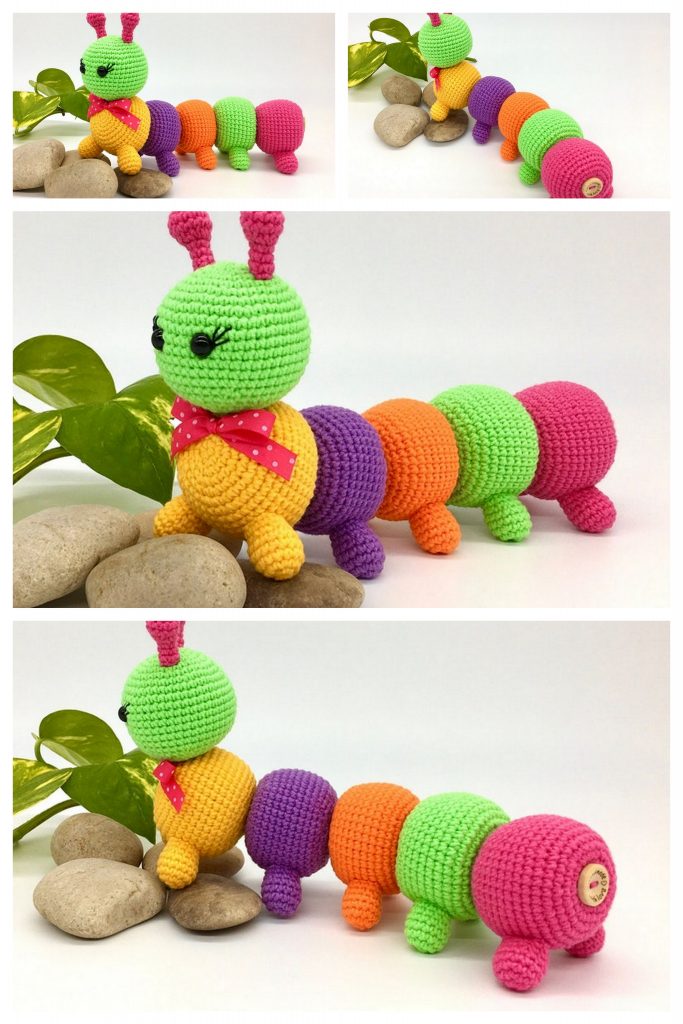
Amigurumi Caitlin the Caterpilar Free Pattern
Hello dear Amigurumi Followers
Today we share one free amigurumi crochet pattern again for you. As you know we share new amigurumi free patterns every day. The main crochets are amigurumi gazelles, amigurumi bears, amigurumi pola, amigurumi pandas, amigurumi penguins, amigurumi giraffes, amigurumi llama, amigurumi pigs, amigurumi bunny, amigurumi clowns, amigurumi lambs, amigurumi bees, amigurumi unicorns, amigurumi dolls, amigurumi foxes, amigurumi penguins, amigurumi dinosaurs, amigurumi elephants, amigurumi hippos, amigurumi monkeys, amigurumi cats, amigurumi dogs and more …
Todays daily new amigurumi free crochet pattern is Amigurumi Caitlin the Caterpilar.
I want to give you some informations about this pattern ;

Size:
Actual – Completed Caterpillar is approx
measurements – 35 cm/14 in long
YOU WILL NEED
– 1 x 100g ball of Paintbox Yarns Simply DK in each
of A – Champagne White, B – Tomato Red,
C – Daffodil Yellow, D – Slate Green and E – Candyfloss Pink
– Oddment of black yarn (or embroidery thread) for eyes
– 3.00mm (UK 11 – US C2/D3) crochet hook
– Washable toy filling
– Red crayon (optional – to colour cheeks)
TENSION (GAUGE)
When making a toy such as this, it is not essential to work to the exact tension. If your tension is tight, with more stitches and rows than stated, your toy will be smaller. If your tension is loose, with less stitches and rows than stated, your toy will be larger. However, if your tension is too loose, the toy filling will show through the crochet and spoil the look of the finished item.
GOOD TO KNOW
– Yarn quantities are based on average requirements and are therefore approximate
– Instructions are written using UK terminology with changes for US terminology given in italics in round brackets ( ) afterwards
ABBREVIATIONS
ch = chain;
cm = centimetres;
dc (sc) = double (single) crochet;
dc2tog (sc2tog) = (insert hook as indicated, yarn over hook and draw loop through) twice, yarn over hook and draw through all 3 loops on hook;
htr (hdc) = half treble (half double crochet);
in = inches;
rs = right side;
ss = slip stitch;
st(s) = stitch(es);
tr (dc) = treble (double crochet);
ws = wrong side
HEAD
Make 2 ch using 3.00mm (US C2/D3) crochet hook and A.
round 1 (rs) 6 dc (sc) into 2nd ch from hook, ss to first dc (sc). 6 sts.
round 2 1 ch (does NOT count as st), 2 dc (sc) into each dc (sc) to end, ss to first dc (sc). 12 sts.
round 3 1 ch (does NOT count as st),(1 dc (sc) into next dc (sc),2 dc (sc) into next dc (sc))6 times,ss to first dc (sc).18 sts.
round 4 1 ch (does NOT count as st), (1 dc (sc) into each of next 2 dc (sc), 2 dc (sc) into next dc (sc)) 6 times, ss to first
dc (sc). 24 sts.
round 5 1 ch (does NOT count as st), (1 dc (sc) into each of next 3 dc (sc), 2 dc (sc) into next dc (sc)) 6 times, ss to first
dc (sc). 30 sts.
round 6 1 ch (does NOT count as st), (1 dc (sc) into each ofnext 4 dc (sc), 2 dc (sc) into next dc (sc)) 6 times, ss to first
dc (sc). 36 sts.
round 7 1 ch (does NOT count as st), (1 dc (sc) into each of next 5 dc (sc), 2 dc (sc) into next dc (sc)) 6 times, ss to first
dc (sc). 42 sts.
round 8 1 ch (does NOT count as st), (1 dc (sc) into each of next 6 dc (sc), 2 dc (sc) into next dc (sc)) 6 times, ss to first
dc (sc). 48 sts.
round 9 1 ch (does NOT count as st), (1 dc (sc) into each of next 7 dc (sc), 2 dc (sc) into next dc (sc)) 6 times, ss to first
dc (sc). 54 sts.
round 10 1 ch (does NOT count as st), 1 dc (sc) into each dc (sc) to end, ss to first dc (sc).
rounds 11 to 24 As round 10.
round 25 1 ch (does NOT count as st), (1 dc (sc) into each of next 7 dc (sc),dc2tog (sc2tog) over next 2 sts)6 times, ss to
first dc (sc). 48 sts.
round 26 1 ch (does NOT count as st), (1 dc (sc) into each of next 6 dc (sc),dc2tog (sc2tog) over next 2 sts)6 times, ss to
first dc (sc). 42 sts.
round 27 1 ch (does NOT count as st), (1 dc (sc) into each ofnext 5 dc (sc), dc2tog (sc2tog) over next 2 sts) 6 times, ss to first dc (sc). 36 sts.
round 28 1 ch (does NOT count as st), (1 dc (sc) into each of next 4 dc (sc), dc2tog (sc2tog) over next 2 sts) 6 times, ss to first dc (sc). 30 sts.
Insert toy filling so Head is firmly filled. Now complete Head, inserting more toy filling as required, as follows:
round 29 1 ch (does NOT count as st), (1 dc (sc) into each of next 3 dc (sc), dc2tog (sc2tog) over next 2 sts) 6 times, ss to first dc (sc). 24 sts.
round 30 1 ch (does NOT count as st), (1 dc (sc) into each of next 2 dc (sc), dc2tog (sc2tog) over next 2 sts) 6 times, ss to first dc (sc). 18 sts.
round 31 1 ch (does NOT count as st), (1 dc (sc) into next dc (sc), dc2tog (sc2tog) over next 2 sts) 6 times, ss to first dc
(sc). 12 sts.
round 32 1 ch (does NOT count as st), (dc2tog (sc2tog) over next 2 sts) 6 times, ss to first dc (sc). 6 sts.
Fasten off.
Making sure Head is firmly and evenly filled, and inserting extra toy filling if needed, run a gathering thread around top
of last round worked. Pull up tight (to close the hole) and fasten off securely.
Using photograph as a guide and black, embroider eyes onto
Head level with rounds 18 and 19 and approx 8 sts apart. If desired, use red crayon to colour in circles to form cheeks.
ANTENNAE (MAKE 2)
Make 2 ch using 3.00mm (US C2/D3) crochet hook and A.
round 1 (rs) 6 dc (sc) into 2nd ch from hook, ss to first dc (sc). 6 sts.
round 2 1 ch (does NOT count as st), 2 dc (sc) into each dc (sc) to end, ss to first dc. 12 sts.
round 3 1 ch (does NOT count as st), 1 dc (sc) into each dc (sc) to end, ss to first dc.
rounds 4 to 6 As round 3.
round 7 1 ch (does NOT count as st), (dc2tog (sc2tog) over next 2 sts) 6 times, ss to first dc (sc). 6 sts.
rounds 8 to 12 As round 3.
Fasten off.
Insert a little toy filling inside each Antennae. Using photograph as a guide, sew Antennae to top of Head.
BODY SECTIONS (MAKE 4)
Make 2 ch using 3.00mm (US C2/D3) crochet hook and B.
round 1 (rs) 6 dc (sc) into 2nd ch from hook, ss to first dc (sc). 6 sts.
round 2 1 ch (does NOT count as st), 2 dc (sc) into each dc (sc) to end, ss to first dc (sc). 12 sts.
round 3 1 ch (does NOT count as st), (1 dc (sc) into next dc (sc), 2 dc (sc) into next dc (sc)) 6 times, ss to first dc (sc).
18 sts.
round 4 1 ch (does NOT count as st), (1 dc (sc) into each of next 2 dc (sc), 2 dc (sc) into next dc (sc)) 6 times, ss to first dc (sc). 24 sts.
round 5 1 ch (does NOT count as st), (1 dc (sc) into each of next 3 dc (sc), 2 dc (sc) into next dc (sc)) 6 times, ss to first dc (sc). 30 sts.
round 6 1 ch (does NOT count as st), (1 dc (sc) into each of next 4 dc (sc), 2 dc (sc) into next dc (sc)) 6 times, ss to first dc (sc). 36 sts.
round 7 1 ch (does NOT count as st), (1 dc (sc) into each of next 5 dc (sc), 2 dc (sc) into next dc (sc)) 6 times, ss to first dc (sc). 42 sts.
round 8 1 ch (does NOT count as st), 1 dc (sc) into each dc (sc) to end, ss to first dc.
rounds 9 to 17 As round 8.
round 18 1 ch (does NOT count as st), (1 dc (sc) into each of next 5 dc (sc), dc2tog (sc2tog) over next 2 sts) 6 times, ss to first dc (sc). 36 sts.
round 19 1 ch (does NOT count as st), (1 dc (sc) into each of next 4 dc (sc), dc2tog (sc2tog) over next 2 sts) 6 times, ss to first dc (sc). 30 sts.
round 20 1 ch (does NOT count as st), (1 dc (sc) into each of next 3 dc (sc), dc2tog (sc2tog) over next 2 sts) 6 times, ss to first dc (sc). 24 sts.
round 21 1 ch (does NOT count as st), (1 dc (sc) into each of next 2 dc (sc), dc2tog (sc2tog) over next 2 sts) 6 times, ss to first dc (sc). 18 sts.
round 22 1 ch (does NOT count as st), (1 dc (sc) into next dc (sc), dc2tog (sc2tog) over next 2 sts) 6 times, ss to first
dc (sc). 12 sts.
Fasten off.
Make another 3 Body Sections in this way – one using C, one using D and one using E.
Insert toy filling into Body Section in E so it is firmly filled then, using photograph as a guide, sew this Body
Section to Head. Insert toy filling into other 3 Body Sections and sew these Body Sections to
each other as in photograph.
LEGS (MAKE 8)
Make 2 ch using 3.00mm (US C2/D3) crochet hook and B.
round 1 (rs) 6 dc (sc) into 2nd ch from hook, ss to first dc (sc). 6 sts.
round 2 1 ch (does NOT count as st), 2 dc (sc) into each dc (sc) to end, ss to first dc. 12 sts.
round 3 1 ch (does NOT count as st), 1 dc (sc) into each dc (sc) to end, ss to first dc.
rounds 4 to 8 As round 3.
Fasten off.
Make another 7 Legs in this way – one more using B, and then 2 in each of C, D and E.
Insert a little toy filling inside each Leg so they are very firmly filled. (Note: If the Legs are not filled enough they will not support the Body Sections and Caterpillar will not be able tostand up!) Using photograph as a guide, sew 2 Legs to each Body Section, mixing colours so that colour used for Legs does NOT match colour of Body Section they are sewn to.
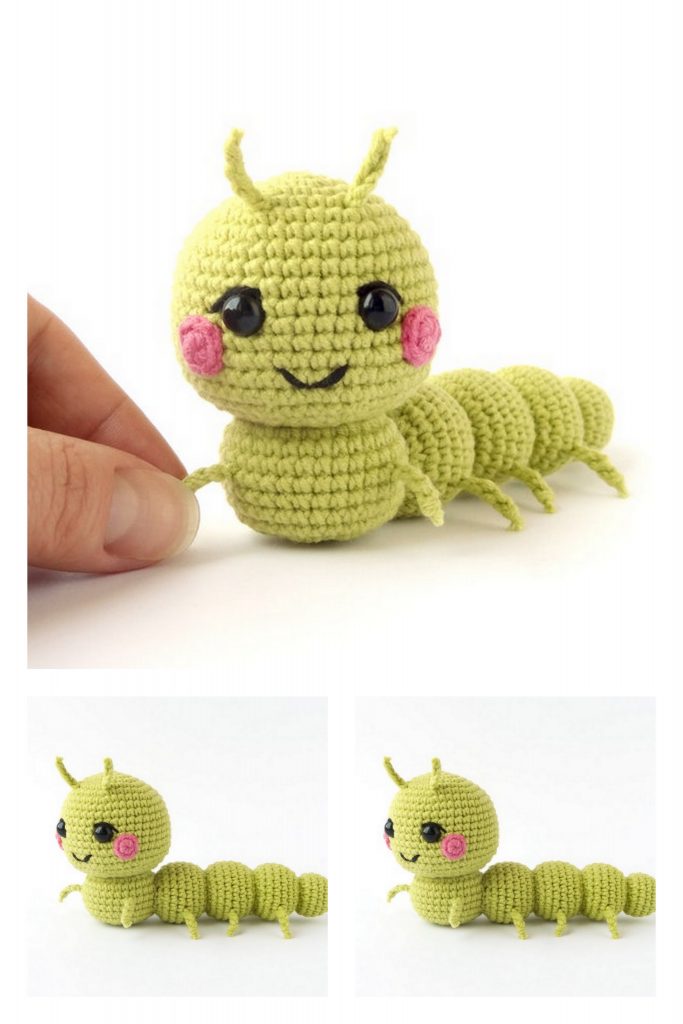
More Amigurumi Caterpilar Ideas: